Table of Contents:

Choosing the Right Footwear for Nepal's Trekking
Difference of Hiking Shoes, Trekking Boots and Trail Runners
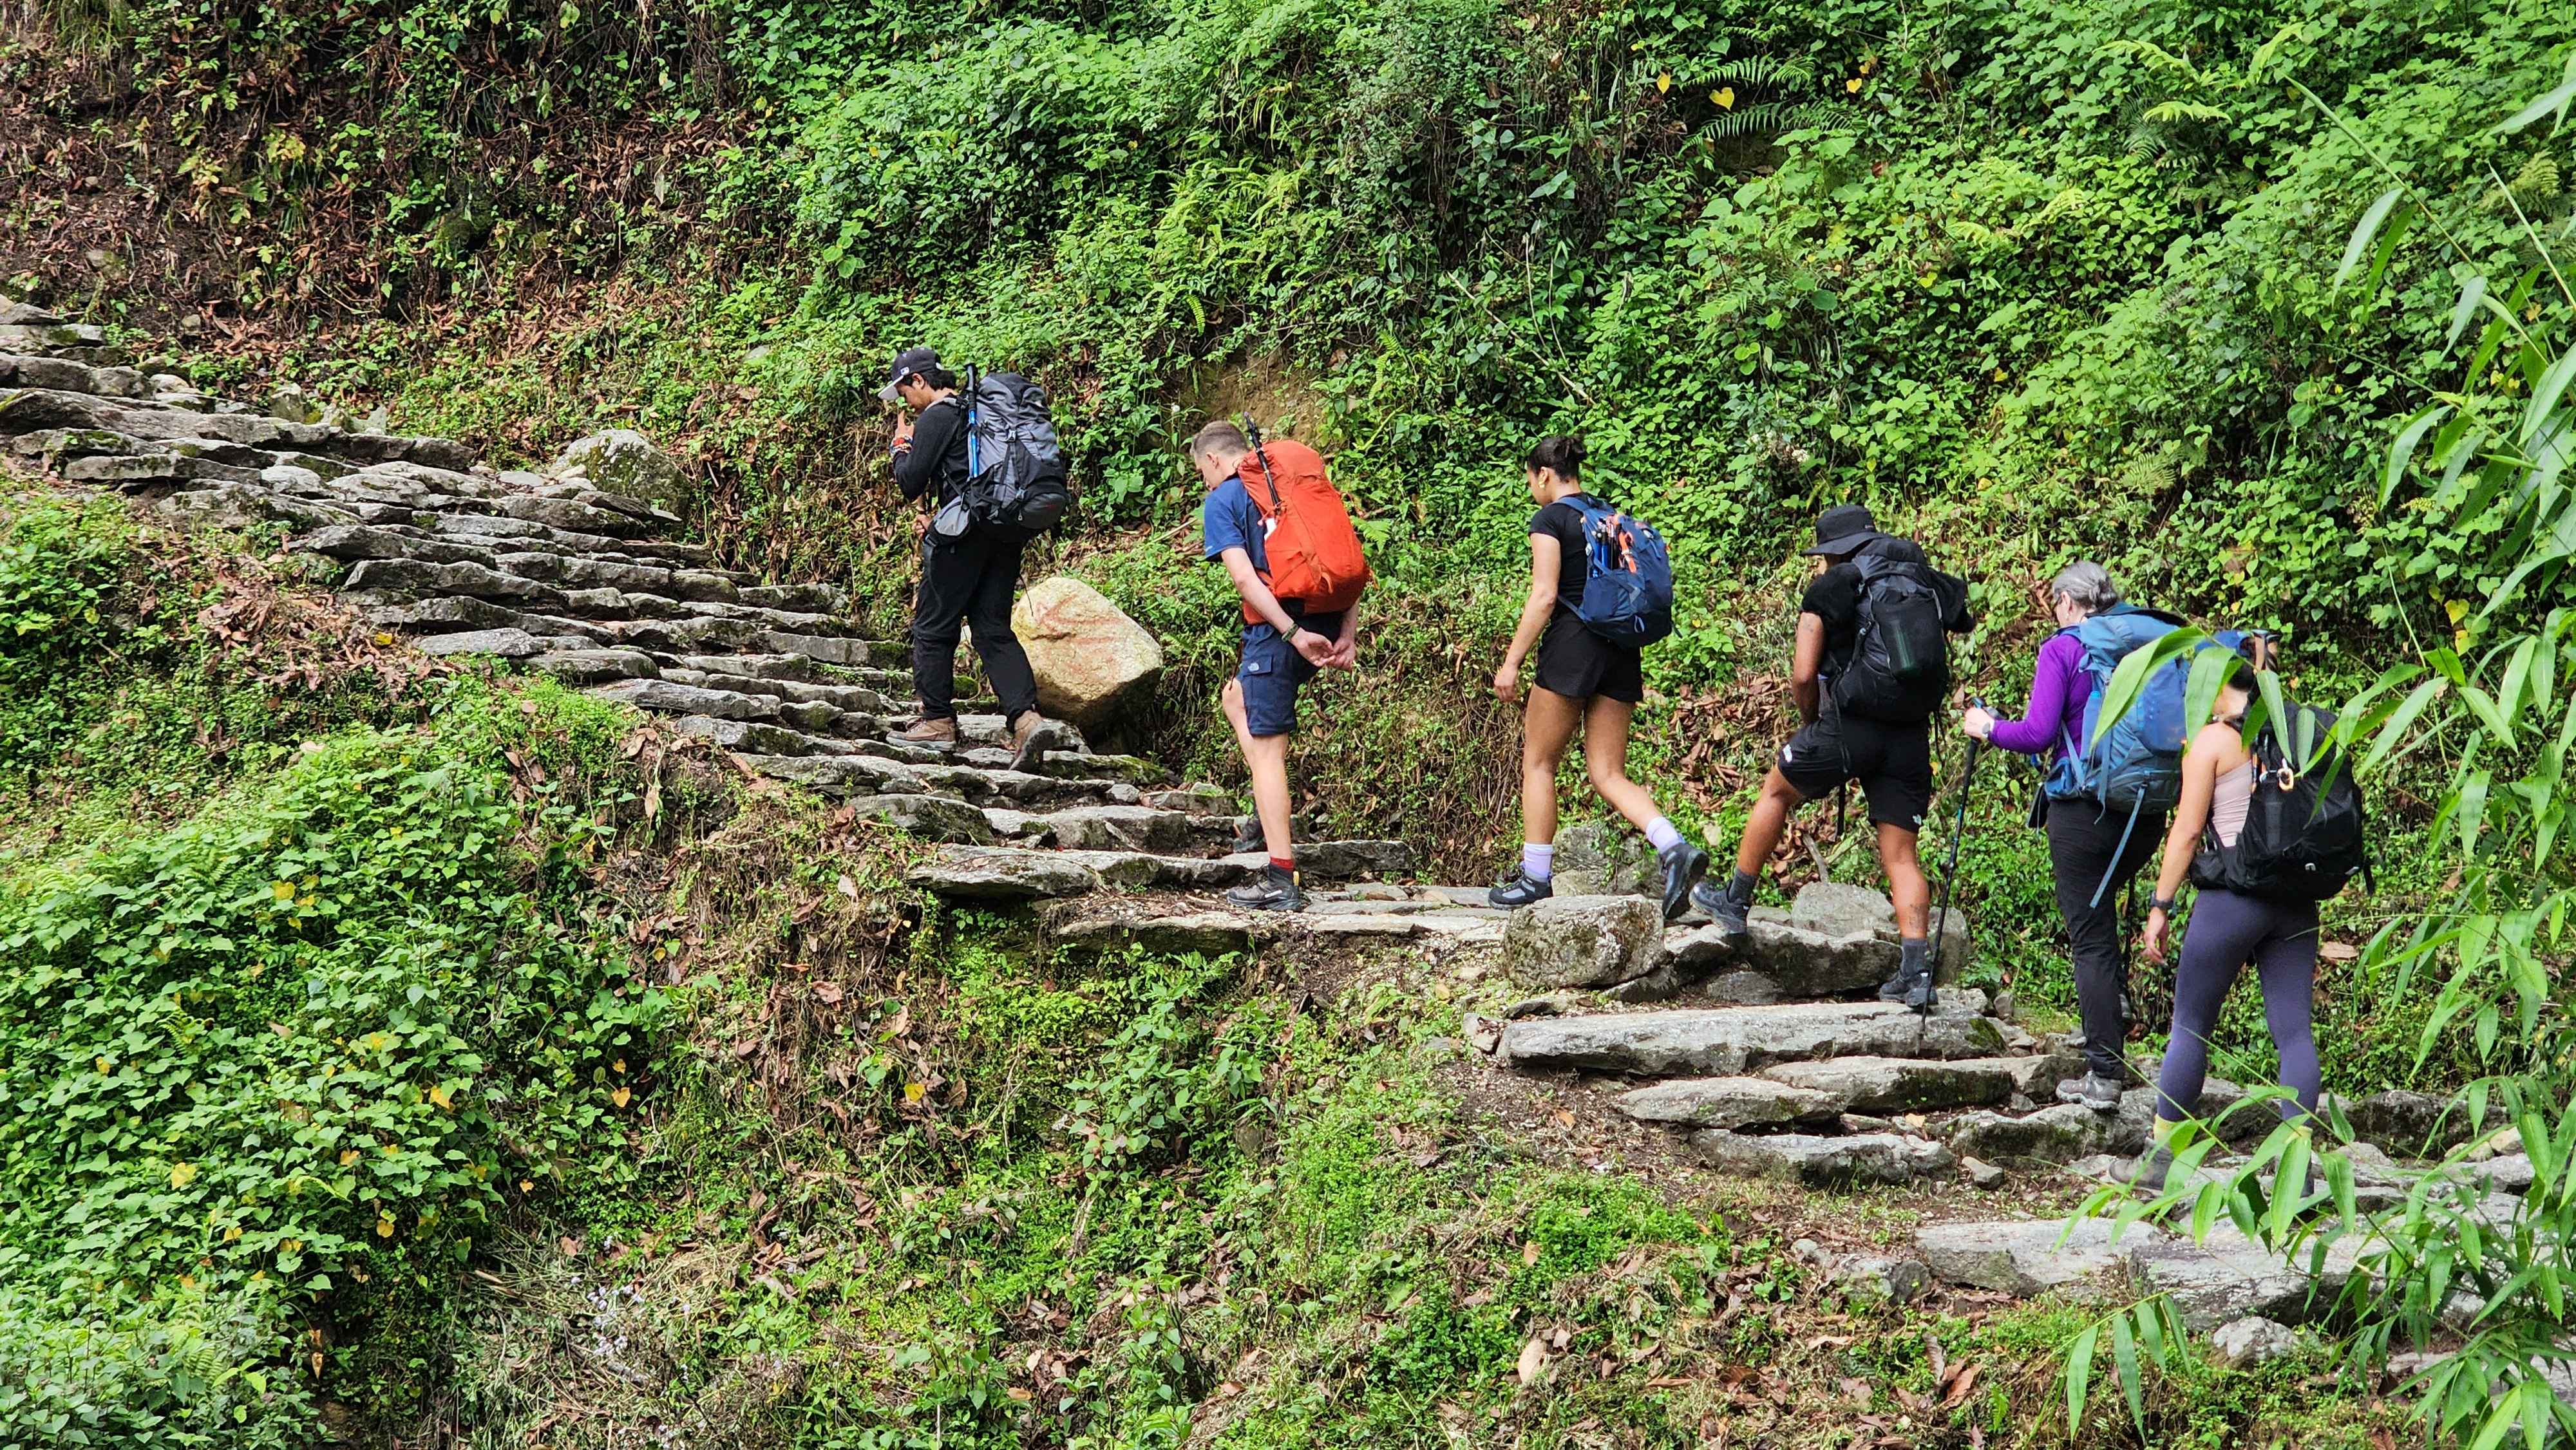
Are hiking and trekking different?
Yes, and the difference is larger than a matter of vocabulary. In shops, in online listings and among friends the two words are swapped freely. People who spend their seasons on trails tend to use them precisely, because the walking they describe is not the same.
A hike is a walk of a few hours to a day, usually on a marked and maintained path, and it ends at a road or a bed. A trek is a multi-day walk over rough, remote or high ground, where the terrain, the weather and the altitude set the terms rather than the walker. That is why gear is chosen differently for each. Footwear for a hike has to be comfortable for a day. Footwear for a trek has to stay protective, warm enough and secure on the tenth day as well as the first, and it cannot be replaced halfway up a valley.
The shoe labels have the same problem. "Hiking shoes", "trekking shoes" and "trail runners" are used interchangeably in stores and online, yet they describe genuinely different footwear built for different demands. Everyday sneakers or city shoes were never designed for any of it. The answer for each Nepal trek comes first below. The sections after it explain how the three types differ, where each works best, and what Nepal's trails ask of a foot.
A Nepal note on the word "trek"
Most popular Nepal treks follow well-worn tea-house routes with villages every few hours, so they are not unmarked in the strict sense. They are still treks because of their length, their altitude, the swings in weather and the sheer volume of stone steps. The footwear question is set by those conditions and not by the label.
Which footwear for which Nepal trek?
For most Nepal treks, take waterproof trekking boots that fit properly and have been walked in before departure. Hiking shoes are a reasonable second choice only on short, dry-season routes such as Ghorepani Poon Hill. Trail runners are not unsafe, but they leave the least margin on Nepal's stone steps, loose rock, cold and descents. On Mera Peak a second pair is needed for summit day: insulated mountaineering boots that fit crampons.
Trekking boots: Stiff protective sole, ankle coverage, secure heel, usually waterproof.
Hiking shoes: Defensible on short, dry routes with strong ankles and a light pack.
Trail runners: Soft sole bruises on stone and scree, thin upper, little insulation.
Trail conditions and the recommended boot for each route, in one place. Pass heights differ by a few metres between sources, so confirm with a current operator.
Trek | Highest Point | What is the Trail Like? | Conditions That Matter | Boots to Take |
About 3,210 m | Uneven stone steps, forest trails and suspension bridges | Wet, slippery stones; leeches during monsoon; cold mornings | Sturdy trekking boots. Hiking shoes may be suitable here. | |
Langtang Valley | About 3,800 m (Kyanjin Gompa) | Forest paths, stone stairs, dusty switchbacks and rocky moraine near the upper valley | Altitude and cold at higher elevations | Lightweight to midweight trekking boots |
About 4,130 m | Long stone staircases, forest trails with roots and mud, and rocky paths higher up | Wet stones, slippery roots, monsoon leeches and possible winter snow | Waterproof midweight trekking boots | |
5,364 m | Stone steps, hard-packed dirt shared with mule and yak trains, and loose scree and moraine above Lobuche | Cold temperatures at altitude; wet trails during monsoon | Warm, waterproof trekking boots; insulated boots in winter | |
About 5,416 m (Thorong La Pass) | Roads, dusty tracks, rocky sections and a long pre-dawn climb followed by a steep descent | Sub-zero temperatures, possible ice in any season and winter pass closures | Waterproof trekking boots with enough warmth for the pass crossing | |
About 5,106 m (Larkya La Pass) | Loose stones, rocky and muddy sections, bridges, snow patches and a long, steep descent after the pass | Remote terrain, severe cold and fresh snow that can hide the trail | Sturdy, waterproof trekking boots with ankle coverage | |
Everest Circuit (Gokyo, Cho La and EBC) | Cho La: about 5,420 m; Renjo La: about 5,360 m | Rocky EBC trails, Gokyo moraine and glacier terrain around Cho La | Cold nights at high altitude and early starts on pass days | Warm, waterproof trekking boots with a relatively stiff sole |
Kongma La: about 5,535 m | Moraine and loose scree on Kongma La, glacier terrain on Cho La and less technical terrain on Renjo La | Early pass crossings, severe cold and snow or ice on high passes | Warm, stiff, waterproof trekking boots | |
6,476 m | Forest trails and remote villages on the approach, followed by snow and crevassed glacier terrain above Khare | Very cold summit conditions, pre-dawn start and crevasse hazards above high camp | Trekking boots for the approach; B2/B3 insulated mountaineering boots for summit day |
Poon Hill and Annapurna Base Camp are decided by stairs and not altitude. Everest, Manaslu and the pass treks are decided by cold, loose rock and snow. That is why one boot answer does not fit all nine, and why the recommendation changes between them.
Trail runners
What they are
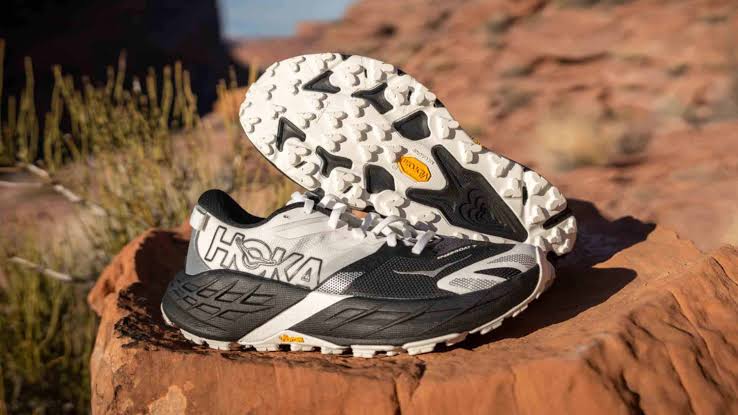
A beefier running shoe: grippy tread, a little more stiffness than a road shoe, cut below the ankle. The Appalachian Mountain Club (AMC) puts them at roughly 18 to 24 ounces a pair.
Built for: Fast, light movement on gentle to moderate trails with a light pack.
Strengths: Lightest, comfortable straight from the box, quick to dry.
Limits: Soft soles bruise on sharp rock, thin upper protection, little warmth, soft rubber that wears fast.
Suited best to: Short, dry routes for walkers with strong ankles and a light load. Also useful as a camp or backup shoe.
Hiking shoes
What they are
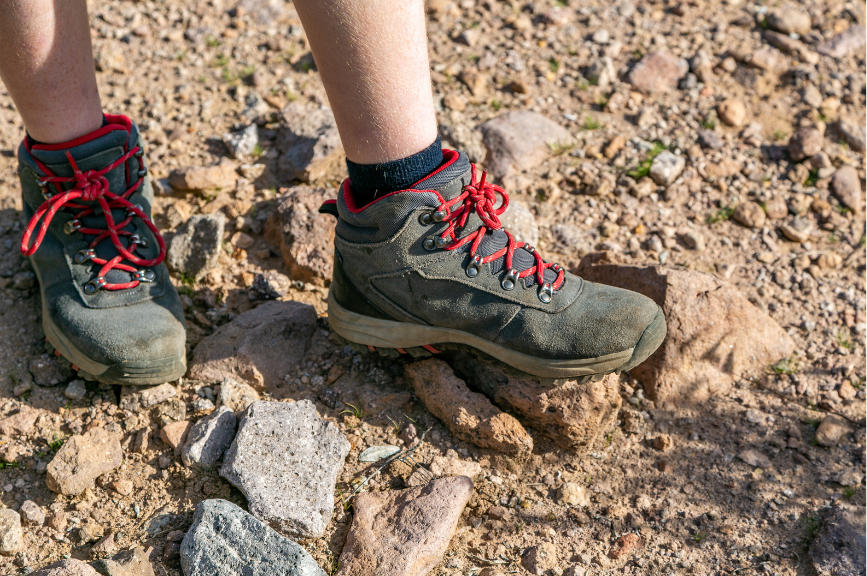
A low-cut shoe with a sturdier, more protective upper and a grippier outsole than a trail runner.
Built for: Day hikes and light multi-day walks on maintained trails.
Strengths: Lighter than boots, little break-in needed, versatile.
Limits: No ankle coverage. Lasts longer than a trail runner, but well short of a good boot, and gives modest warmth.
Suited best to: Short, dry-season routes such as Ghorepani Poon Hill.
Trekking boots
What they are
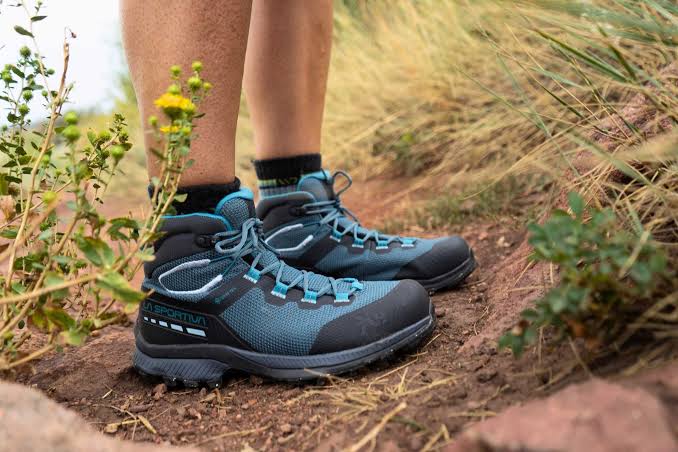
A higher collar, a stiffer and harder-wearing sole, and an upper from full leather to fabric blends. About two to three pounds for a midweight pair, per AMC.
Built for: Multi-day walks on rough ground, with a pack, in changeable weather.
Strengths: Stable platform, protection from rock and debris, durability, more warmth, usually waterproof.
Limits: Heavier, slower to dry, needs a break-in period.
Suited best to: Most Nepal treks, especially long, high or cold ones.
Trail type | Typical conditions | Footwear |
Easy, maintained trails (1 to 2 days) | Marked, graded path, light pack, mostly dry weather | Can be used: hiking shoes or trail runners |
Rough, steep and rocky trails (multi-day hiking and trekking) | Uneven rock, stone steps, long descents, changing weather, a pack on tired legs | Recommended: trekking boots |
High passes, snow or ice (Cold, remote sections) | Frozen ground, snow, glacier travel on some routes, pre-dawn starts | Recommended: warm, stiff, waterproof trekking boots. Mountaineering boots for summit days. |
For experienced trekkers: Experienced trekkers who feel comfortable doing a trek in hiking shoes or trail runners can do so, at their own risk. To be on the safer side, and on professional advice, Freedom Adventures recommends trekking boots.
Stiffness and coverage, in general
Individual models vary widely.
Trail runner
low cut, flexible
Hiking shoe
low cut, moderate
Trekking boot
mid to full height
Mountaineering boot
full height, rigid
What goes wrong when the footwear is wrong?
Feet rarely fail dramatically. They fail slowly, then all at once. A hot spot on day two becomes a blister on day three and a limp by day five. By day six, on a descent that never seems to end, the heel is raw, the toes slam the front of the boot with every step and each stone stair becomes a decision. None of it is dramatic, and nearly all of it is avoidable. This is a plausible version built from the problems documented below, not one trekker's story.
One trekker's account from the Manaslu Circuit shows how quickly the requirement can change. A group wearing trail runners met calf-deep snow after the pass, pulled plastic bags over their socks and pushed on. It worked because the cold kept the snow firm. Plan for the day it is not firm.
Feature by feature: where they really differ
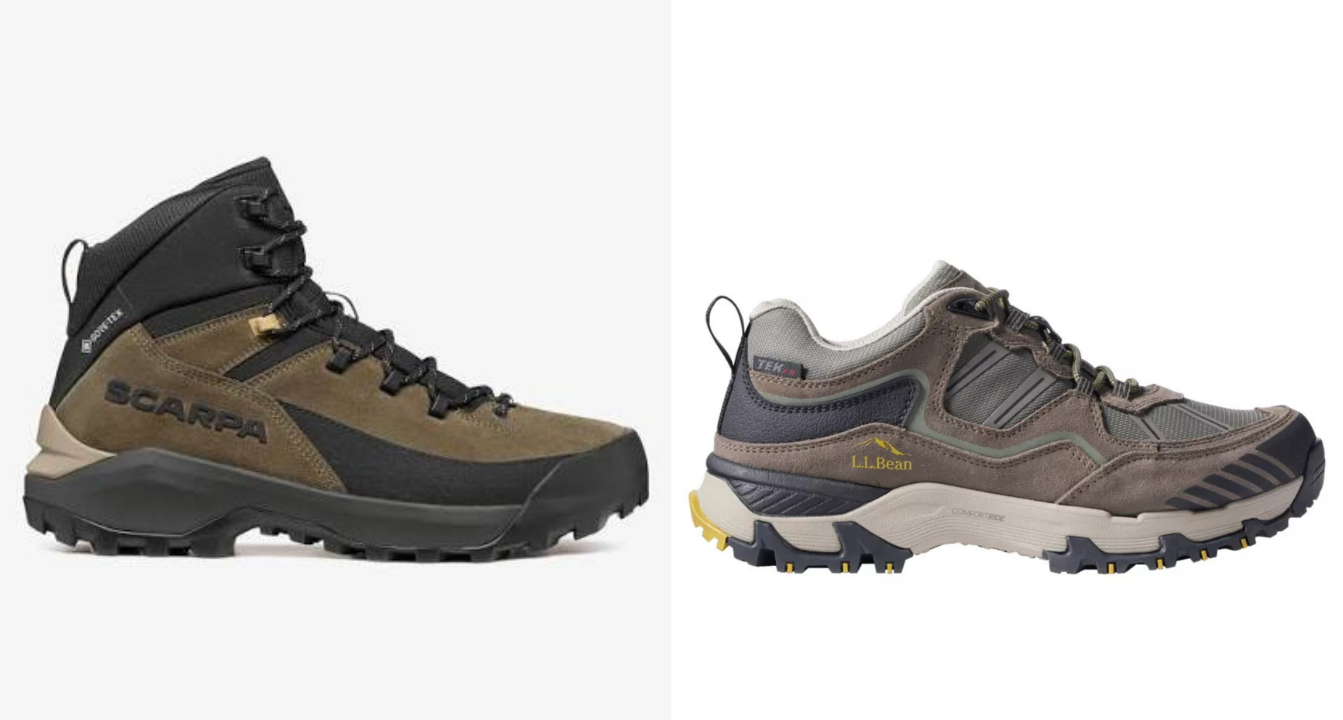
The table gives the overview. The pictures and short notes below it explain the three differences that matter most on Nepal's trails: sole stiffness, grip and heel hold.
Feature | Trail runners | Hiking shoes | Trekking boots |
Sole stiffness | Generally flexible | Moderate, model dependent | Flexible to stiff |
Ankle coverage | Low cut | Low cut | Mid to full height |
Grip | Soft, grippy rubber that wears fast (about a season) | Varies | Harder, longer-lasting rubber |
Cushioning | Soft and plush, can collapse over distance | Moderate | Firmer, built to support |
Weight | Lightest | Light to moderate | Moderate to heavy |
Sole protection | Bruises on sharp rock | Moderate | Generally good |
Waterproof options | Some models | Some models | Common |
Snow and cold | Poor | Limited | Moderate, depends on insulation |
Drying time | Fastest | Fast to moderate | Slower, slowest if waterproof |
Break-in | Little | Little to some | Needed |
Sole and stiffness
Stiffness matters more as load, fatigue and unevenness increase. On a long irregular staircase a stiffer platform spreads pressure across the foot and spares the small muscles of the foot and ankle. A quick check in the shop: hold the toe in one hand and the heel in the other and twist. A stiff boot resists strongly, a trail runner twists easily. AMC names torsional rigidity as the most important property of a hiking shoe.
Grip
Traction comes from the rubber compound, the lug pattern, the lug depth and how much rubber actually touches the ground. Softer rubber grips smooth wet rock better but wears faster. Deep, widely spaced lugs bite into mud and loose soil, but on smooth stone steps tall lugs leave less rubber in contact and can squirm under load, and in sticky mud they can clog.
Cushioning and weight
A plush midsole feels wonderful in a shop, but many maximalist trail-runner midsoles collapse as the miles build. Boots are firmer by design, trading some softness for a platform that stays stable. The weight advantage of light shoes is real. A pound on the feet equals five on the back and adds that, whether or not the ratio is exact, hiking is less effort in lighter footwear. The question for Nepal is what is given up in exchange.
Waterproofing and drying
A waterproof membrane such as Gore-Tex blocks liquid water while letting some vapour out. The trade-off is breathability: any membrane reduces it, and a sweaty foot may end the day damp regardless. The limit is the collar. Water that comes in over the top, in a stream crossing or deep snow, stays inside, and a soaked waterproof boot can take far longer to dry than a mesh shoe.
Waterproof suits most of Nepal's season range, especially monsoon, spring snowmelt and winter. Non-waterproof suits trekkers who run hot, walk mainly in dry autumn weather and plan to dry their boots each night. "Waterproof" describes a limited barrier, not a guarantee.
A light trail runner feels excellent on a short, dry, graded trail. After several days of stone steps, loose rock, wet surfaces and steep descents on tired feet, the same shoe is asked to do more than it was built for. The shoe has not changed. The demands have.
Understanding ankle coverage and stability
The popular claim is that high boots stop ankle injuries. The evidence is thinner than the marketing. In one lab test, high-tops reduced ankle roll by a few degrees and slowed it, which counts for something. Other reviews find the research insufficient to recommend high-tops for preventing sprains, and all of it is on sports shoes. None of it tested trekking boots. Sources are listed at the end of the page.
The practical position fits that mixed picture: torsional rigidity matters most, collar height is secondary, and fit matters because the foot should not slide inside the shoe. In practice, "support" is four things working together:
The collar protects the ankle bones from knocks, scree, mud and debris.
A stiff sole resists the sideways roll on uneven ground.
A secure heel keeps the boot moving with the foot rather than around it.
Feel. Some people sense foot position better in a snug collar, while others feel thick footwear dulls it.
What a boot cannot do
It cannot hold the ankle rigid against a hard roll while carrying a pack on tired legs. Conditioning, trekking poles and careful foot placement matter as much. The case for boots rests on platform, protection and heel hold, not on a belief that boots make ankles injury-proof.
Why downhill walking changes everything
Most people shop for boots by thinking about climbing. The descent is where footwear is tested. Going down, the legs brake against gravity and the foot is driven forward, so a loose heel lets the toes hit the front of the boot with every step. The result is bruised and black toenails that can take months to clear. Reports from the Everest Base Camp trail list aching knees from steep descents among the commonest complaints, and stone staircases give no cushion on the way down.
What helps is consistent across sources:
A heel cup that matches the shape of the heel. Lacing cannot rescue the wrong shape.
Heel-lock lacing, shown below.
Toe clearance when standing on a slope, without a loose fit.
Trimmed toenails.
Fit tested on an incline, not only on a flat shop floor.
The heel-lock
Most heel slip is solved by a different lacing pattern and not a different boot. The heel lock uses the top two eyelets to pin the heel down where the foot curves up at the ankle, so the foot cannot slide forward when the descent starts.
Lace normally up to the second-last eyelet.
Take each lace straight up through the top eyelet on its own side, leaving a small loop.
Cross the laces and thread each end through the loop on the opposite side.
Pull down and out until the heel feels held, then tie as usual.
Do it at the top of a long descent, not at the bottom when the toes already hurt. Practice it at home first, because the first attempt in cold hands at 5,000 m is a poor time to learn.
A boot that feels perfect climbing can expose its faults on a long descent. Downhill fit can matter more than uphill comfort, and a long descent such as the one after Larkya La is where heel hold and braking traction are tested hardest.
The mistakes that cost trekkers most
Buying boots days before departure, so there is no time to break them in
Choosing by looks or weight alone, or trusting a brand or an online size chart over the foot
Fitting only on a flat floor, which hides downhill problems
Wearing cotton socks, which hold moisture against the skin
Assuming waterproof means fully waterproof, or that all boots are equally stiff
Confusing trekking boots with mountaineering boots
Repeating "trail runners are all you need" without checking the trek, the season and the terrain
What makes Nepal's trekking trails different?
Stone staircases of irregular height. Stone is harder than dirt, so impact is felt on every step (a reasoned point, not a measured one). The Annapurna Base Camp route alone includes about 2,500 steps down from Chhomrong.
Descents as long as the climbs, often steep, with a daypack still on.
Wet stone and monsoon mud, with leeches in the lower forests.
Mixed traffic. Mule and yak trains have right of way, so trekkers step aside onto uneven ground.
Cold, frozen ground and snow above about 4,000 m.
Remoteness. Valleys such as Manaslu are rugged and far from help, so a foot problem costs more.
Many trekkers have a porter carry the main bag, which helps. A daypack is lighter than a backpacking load but not nothing, and it adds to the force of every descending step.
Nepal Trekking Trail style
Each route has its own character underfoot. This is what the ground is like on the nine treks covered here. The boot recommendation for each is in the table near the top of the page.
1. Ghorepani Poon Hill
Stone-stair forest trail
About 3,210 m. Continuous uneven stone steps through forest, with suspension bridges and villages. The lowest of the nine, so the challenge is stairs, not altitude. Wet stone, and leeches in monsoon.
2. Langtang Valley
Valley and forest path
About 3,800 m at Kyanjin Gompa. Forest path, stone stairs and dusty switchbacks, with rocky moraine near the top. Altitude is the main difficulty, and the upper days are cold.
3. Annapurna Base Camp
Stairs, roots and mud
About 4,130 m. Roughly 2,500 stone steps down from Chhomrong, then a climb to Sinuwa, through forest with roots and mud. The upper trail is rocky, and snow is possible near the top in winter.
4. Annapurna Circuit
Varied loop with a high pass
Thorong La at about 5,400 to 5,416 m. Roads and dusty tracks, wet rocky mid-sections, a long pre-dawn climb to the pass and a long descent to Muktinath. Ice is possible in any season.
5. Everest Base Camp
Wide busy path, then moraine
5,364 m. A wide stone-step and hard-packed dirt path shared with mule and yak trains, turning to loose scree and moraine above Lobuche. Cold at height.
6. Everest Circuit (Gokyo, Cho La, EBC)
Moraine and a glacier crossing
Cho La at about 5,420 m. Everest Base Camp terrain, Gokyo moraine and a glacier section on the east side of Cho La. Many nights above 4,700 m.
7. Everest Three Passes
High-pass loop
Kongma La at about 5,535 m. Moraine and loose scree on Kongma La, permanent glacier on Cho La, and Renjo La as the least technical. Pass days start at 4 to 5 am.
7. Manaslu Circuit
Remote and rugged
Larkya La at about 5,106 m. Loose stones, rocky and muddy sections, bridges and snow patches, then a long steep rocky descent after the pass. Remote, and fresh snow can hide the route.
9. Mera Peak
Remote approach, glacier summit
About 6,461 to 6,476 m. Forest and remote villages on the approach, then snow and crevassed glacier above Khare. Summit day needs different boots from the walk in.
Why season and region change the answer
The same trail can ask for different footwear in different months, and two regions in the same month can ask for different things. Season sets the surface and the temperature. Region sets the altitude, the remoteness and the terrain underfoot.
Season | Conditions | Footwear emphasis |
Spring, Mar to May | Generally stable. Cold mornings, snow lingering on high passes early, snowmelt mud. | Waterproof boots, gaiters on pass days |
Monsoon, Jun to Aug | Wet stone, mud, slippery roots, leeches, poor visibility. | Waterproofing and gaiters. Boots are hardest to dry. |
Autumn, Oct to Nov | Main season. Dry and stable, cold at altitude, fresh snow possible on high passes. | Most forgiving for lighter footwear on lower routes |
Winter, Dec to Feb | Cold and snow at altitude. Thorong La and Larkya La can be blocked. | Insulation, gaiters, traction devices |
Annapurna is the region of stairs and weather. Warm, wet forest and stone steps on the lower sections, then a cold, icy crossing at Thorong La on the Circuit. Khumbu (Everest) is higher, colder and drier, with hard-packed trail shared with animals, then scree and moraine, and many nights above 4,700 m on the pass routes. Manaslu is remote, with loose stone, snow patches and temperatures reported below minus 10 C near the pass. Langtang sits at moderate altitude, with forest, stairs and rocky moraine near the top. Mera Peak adds a glaciated summit to a remote approach.
Watch for: cold feet and tight boots
At 4,000 to 5,000 m feet get cold, swell and tire, and walking slows. A Himalayan Journal review of frostbite lists constrictive footwear among the things that restrict blood flow and raise the risk, and advises checking toes and feet regularly for numbness or pain. Leave room for the sock combination, and do not lace tighter to cure a loose heel in the cold.
Fitting, breaking in, socks and blisters
A boot that feels fine in a shop can fail on a mountain, because the shop test is a few minutes on a flat floor while a trek is many hours on slopes with swollen feet. Fit guidance, including a US Marine Corps boot guide, recommends trying boots on in the afternoon or evening when feet have swelled, wearing the socks the trek will use, and fitting to the larger foot. The heel should stay seated going uphill with at most slight movement, there should be about a thumb's width in front of the longest toe, and the boot should be snug across the ball and instep without pressure points. Replacing the insole changes volume, so test it too.
Foot shape varies, and brands cut their lasts differently, so narrow, wide and high-volume feet may need different models rather than a different size of the same one. Try several before choosing.
Ten-minute shop test
Lace both boots fully
Walk carpet, then hard floor
Climb stairs and check heel lift
Walk down an incline, then stand on it
Check whether the toes touch the front
"Fits inside" versus "fits correctly"
The first means the foot goes in and feels fine standing still. The second means the heel stays seated, the toes clear the front on a slope, no pressure point appears after an hour, and there is room for swelling and thick socks.
The break-in progression
"Breaking in" means two things: the materials soften around the foot, and the wearer finds where the boot rubs, pinches or fails to hold. The second matters more, because problems found at home can still be fixed with lacing, socks, an insole or a different boot. The BMC notes heavier, sturdier boots generally need more break-in than light flexible shoes.
Indoors, then local walks: Short periods first. Note heel movement and toe contact.
Stairs, repeatedly: A close rehearsal for Nepal's stone staircases.
Uneven ground and hills: Rough surfaces and loose gravel.
Longer walks, several days in a row: Consecutive days teach more than one long day.
Trek socks and a similar load: The same liner and thick-sock combination, and the daypack planned for Nepal.
Deliberate descents: This is where toe contact and heel lift show up.
Fix every hot spot before departure: Never make the first serious test of a new boot Day 1 of a Himalayan trek.
How much is enough to break-in the boots?
There is no honest universal number of kilometres. A boot is broken in when it has been walked on varied terrain over several consecutive days with trek socks and a load, with no hot spots, no heel rub and no toe contact on descents. If problems persist after weeks, the cause is probably fit, and more walking will not fix it.
Gaiters and blisters
Sock strategy has its own section below, because it does as much for blisters as the boot does.
Gaiters seal the gap between boot and trouser, keeping out snow, mud, scree and debris. They are an accessory, not a substitute for stiffness, protection or traction. On most Nepal treks they are situational: worth it on a snowy pass day or in monsoon mud, unnecessary on a dry lower trail.
Blisters form when repeated rubbing separates layers of skin. Long repetitive force, moist then wet then dry feet, poorly secured footwear, socks that allow too much or too little movement, heavy loads and doing too much too soon. Daily foot checks, drying boots and socks overnight and holding the heel with proper lacing all help.
Do not walk through a hot spot
A hot spot is the warning stage, warm and tender before any blister exists. At the first one, stop, dry the foot and cover it with tape, a blister plaster or moleskin. Walking on for hours is how a minor irritation becomes a trek-ending injury.
A blister is friction plus moisture, and the sock is where both are managed. The most practical field fix comes from army-recruit research cited by the BMC: wear two layers, a thin low-friction liner against the skin and a thicker, high-friction sock against the boot. Skin stays put on the liner, and the sliding happens between the two socks instead of on the skin.
Liner: thin and slick. Thin polyester.
Outer sock: thick wool or polypropylene. Merino wool is the usual choice on the trail.
Test the pair inside the boot. Two layers add volume, so size and break in the boots with both socks on.
Dry beats fabric. Wet socks nearly doubles blister risk, and once wetness is counted the fibre type did not predict blisters. Carry a spare pair of each layer and change when socks go damp, not when the foot hurts.
Dry everything overnight. Letting boots and socks dry overnight, since the cycle of moist, wet and dry feet feeds blisters.
Skip cotton. It holds moisture against the skin.
Heel-lock lacing stops the heel sliding. The liner and wool pair stops the skin rubbing. Dry spare socks stop the moisture. Together they cover most of what causes blisters.
If you still choose trail runners or hiking shoes
Some trekkers will, and on a few routes it is a defensible call. A page that only argues one side is less useful, so here is how to make that choice with the risk reduced. The list is reasoned judgement and has not been tested on Nepal trails. The more of these that are true, the stronger the case for light footwear.
The route is a short or lower one such as Ghorepani Poon Hill or lower Langtang, with no high pass crossing.
The weather is dry and no snow or ice is expected underfoot.
A porter carries the main bag and the daypack is light.
The ankles are strong and have no history of repeated sprains.
The shoes have a sole that resists the twist test, a protective toe, grippy rubber and a heel that stays put on a slope.
They have already been walked on stairs, hills and descents over several consecutive days.
Warm dry spare socks and trekking poles are packed, with a plan for wet weather or snow.
A boot cannot be broken in on the trek it is needed for, so the practical answer is to buy at home, walk in them for weeks and bring them. Many trekkers wear their boots on the flight or carry them in cabin baggage so that a delayed checked bag cannot leave them without. That last point is common practical advice, not a sourced finding.
Mera Peak and the word "boot"
Mera Peak is a different footwear problem because the trek and the climb need different boots. The approach through the Hinku valley is forest, villages and high pasture, and expedition guidance such as International Mountain Guides' gear list asks for medium-weight, waterproofed, broken-in boots with gaiters. Summit day involves glacier travel, crampons and a pre-dawn start well below freezing. The same list calls for plastic double boots or equivalent, and one expedition guide says plainly that normal trekking boots are not suitable for summit day. Compatibility is the key: crampons must fit the boot and stay on it.
Why trekking boots fail on the summit?
A flexible sole can bend under a crampon and let it fall off, according to the BMC, and the upper may not be warm enough. A summit boot is stiffer, warmer and heavier, so it is a poor choice for the walk in. This guide covers footwear only, not climbing technique.
Category | Stiffness | Weight, warmth | Crampons | Meant for |
Lightweight trekking | Flexible | Light, little insulation | B0, unsuitable | Maintained lower trails, three seasons |
Mid-height trekking | Moderate | Moderate | Generally B0 | Many Nepal routes below the high passes |
Full-height trekking | Stiffer, often leather | Heavier, more protective | Generally B0, microspikes only | Rough ground, heavier loads |
Backpacking | Stiff | Heavy | Generally B0 to B1 | Heavy multi-day loads, more than most tea-house trekkers need |
Mountaineering B1 | Semi-stiff | Warmer | Minimum for crampons, easy snow and ice patches | Shoulder-season snow |
Mountaineering B2, B3 | Stiff, rigid | Heaviest, often insulated | B2 all-day, B3 technical | Glacier, summit, ice |
What the trail is likely to do if you ignore this
Trail runners on stone stairs: a soft sole bruises the foot on stone and scree, day after day, and the knees take the rest of the impact.
Light shoes on a pass morning: thin mesh gives little insulation and soaks through in snow, which is how a cold pass crossing turns into a safety problem.
Loose heel on a descent: the toes hit the front of the boot with every step. Black toenails can take months to clear.
New boots, no break-in: hot spots on day two, blisters by day three. Severe blisters can end a trek and sometimes lead to rescue.
Buying in Thamel the week before: counterfeit gear is widespread there, and boots are on the list of things to avoid.
Nepal’s paths are long, steep and full of stone, and your feet carry you over every step of it. So choose boots that fit you well, walk in them for a few weeks before you go, and learn the heel lock lacing along the way. After that, you can spend the trek looking at the mountains and not thinking about your feet.
KEEP EXPLORING
Uncover similar insights
AMS, HACE, and HAPE on Everest Three Passes Trek
Teahouse Facilities on the Manaslu Circuit Trek with Tsum Valley