Table of Contents:
How to Train For the Annapurna Base Camp Trek?
Day-by-Day Demands, Training Plan, Knee Health, and Mental Grit

Most trekking resources describe the Annapurna Base Camp trek as moderate and leave it there. That classification is correct but tells you almost nothing useful. Moderate in the Himalayas means no ropes, no crampons, no technical skills. It does not mean gentle. The route from Nayapul to ABC and back covers roughly 110 kilometers, gains 3,060 meters of net elevation from the trailhead at 1,070m to base camp at 4,130m, and the cumulative ascent and descent across all the route's ups and downs totals closer to 5,200 to 5,400 meters. There is almost no flat ground anywhere on this trail.
What the route asks of you is the ability to walk 5 to 7 hours per day on steep stone staircases and mountain paths, for 9 consecutive days, carrying a daypack of 5 to 7 kg, at elevations where the air thins and the body works harder for the same effort. That is the specific physical contract the trail requires. The training plan in this guide is built around meeting each part of it.
Day-by-Day Physical Breakdown
Day 3: Nayapul to Ulleri (Trek Day 1) — Moderate-Hard
Village paths then 3,000+ consecutive stone steps
First walking day. The Tikhedhunga to Ulleri staircase begins within the first hour on fresh legs. 3,000+ stone steps gaining roughly 443m of that total elevation. The most underestimated day on the route because the distance looks short on paper.
Day 4: Ulleri to Ghorepani (Trek Day 2) — Hard
Sustained uphill through oak and rhododendron forest
All uphill, all day. The legs from Day 3 are sore and the trail gives no flat recovery ground. This is the highest cardiovascular output day of the trek. Ghorepani at 2,860m is the most comfortable night of the route, with solid teahouses, reliable WiFi, hot showers.
Day 5: Ghorepani to Chuile (Trek Day 3) — Moderate
Pre-dawn Poon Hill (3,210m), descent via Tadapani, side trail to Chuile
Wake at pre-dawn for the 1-hour climb to Poon Hill (3,210m) for sunrise across Dhaulagiri and the Annapurna range. After breakfast in Ghorepani, the trail descends through dense forest toward Tadapani (2,610m), then continues via a side trail down to Chuile (~2,200m). A long day in terms of descent. Chuile is a quiet, small stop, calm and unhurried.
Day 6: Chuile to Sinuwa (Trek Day 4) — Hard
Descent to Kimrong Khola, through Gurjung, climb to Chhomrong (2,170m), steep descent to Chhomrong Khola, re-ascent to Sinuwa
The most physically complex day of the lower trail. You descend to the Kimrong Khola, climb through Gurjung village to Chhomrong (2,170m), the gateway to the sanctuary and the last stop with full facilities, then drop steeply on long stone staircases to the Chhomrong River and climb back up to Sinuwa (2,360m). This is the day that breaks undertrained knees. The cumulative descent and re-ascent is the hardest part, not the net elevation number.
Day 7: Sinuwa to Himalaya Hotel (Trek Day 5) — Moderate
Bamboo and rhododendron forest, Modi Khola valley
A steadier day after Day 6. The trail moves deeper into the sanctuary through dense bamboo and rhododendron forest, passing Bamboo (2,310m) and Dovan (2,600m). Above 2,500m from this point. Himalaya Hotel at 2,920m is the last reliable charging point before the solar-only upper section. Charge everything here.
Day 8: Himalaya Hotel to MBC (Trek Day 6) — Hardest Full Day
Forest to treeline crossing, Deurali (3,230m), open alpine sanctuary
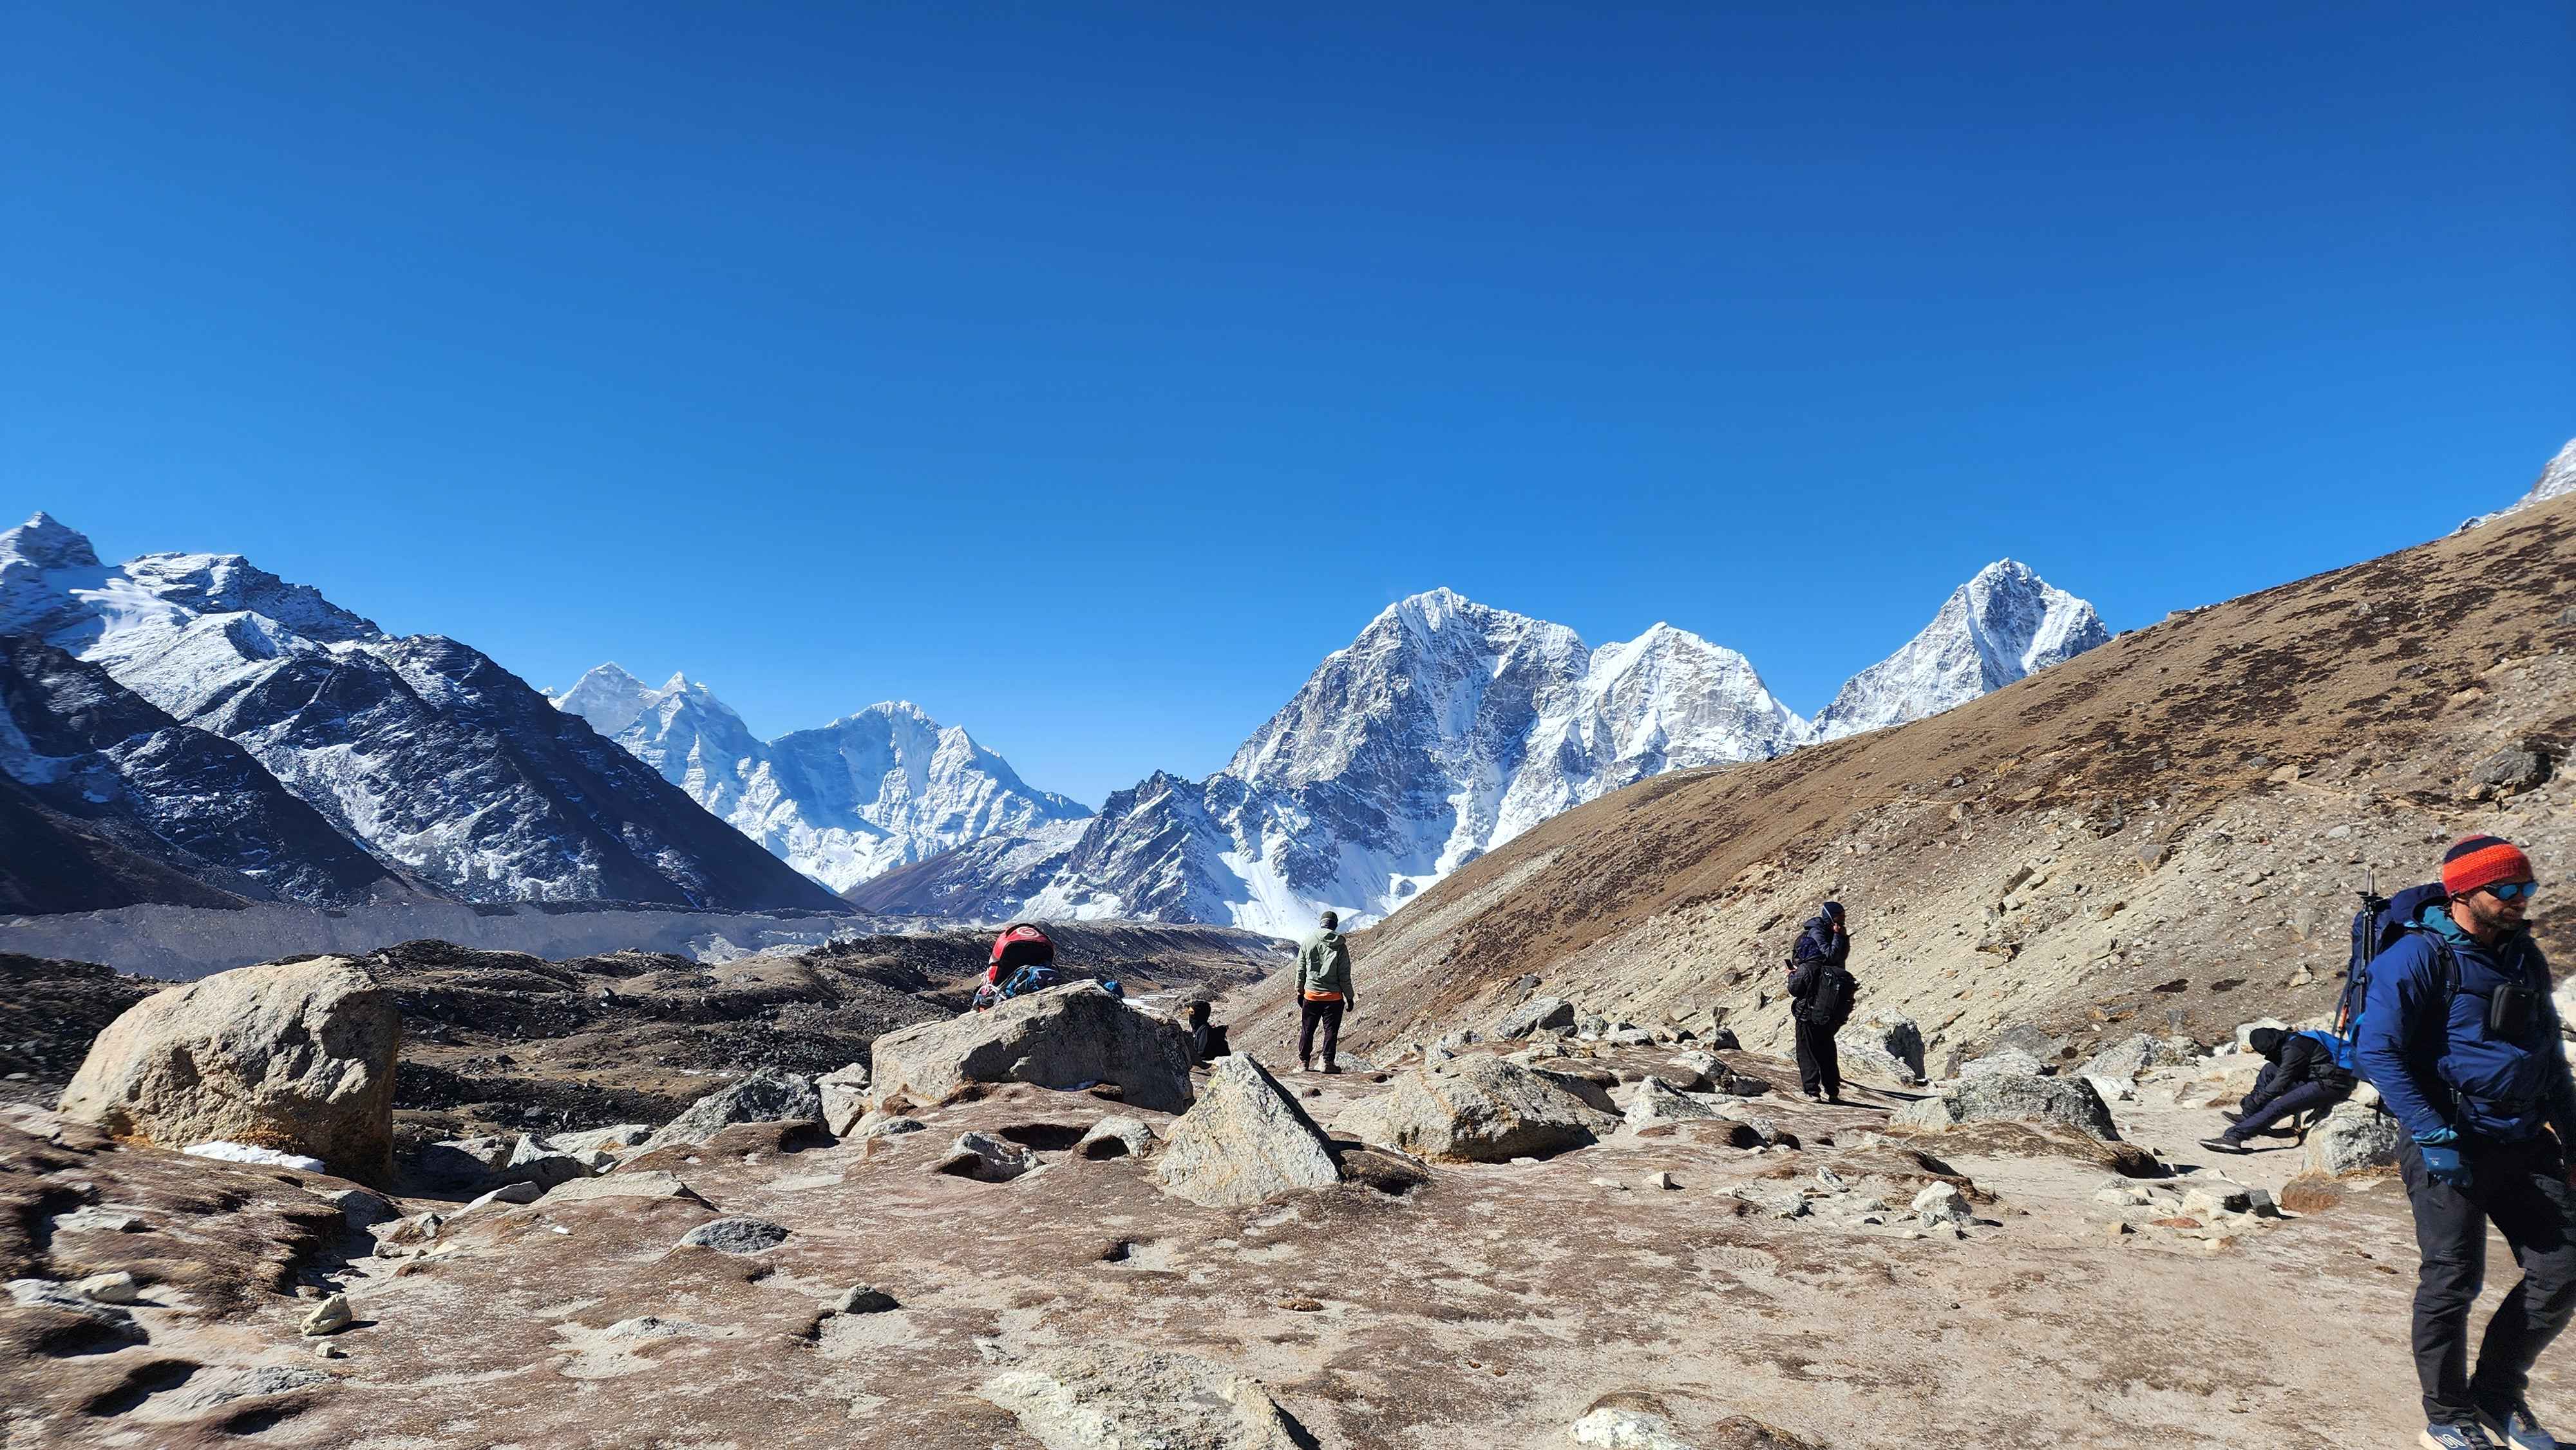
The hardest full day on the trek. From Himalaya you climb through the final bamboo forest to Deurali at 3,230m, the entry to the Annapurna Sanctuary proper. From Deurali the treeline ends and the terrain opens into raw alpine. Every step above Deurali is heavier than the one before. This is the day aerobic base training is doing its work.
Day 9: MBC to ABC (Trek Day 7) — Short, High Altitude
Open moraines, glacial terrain above 4,000m
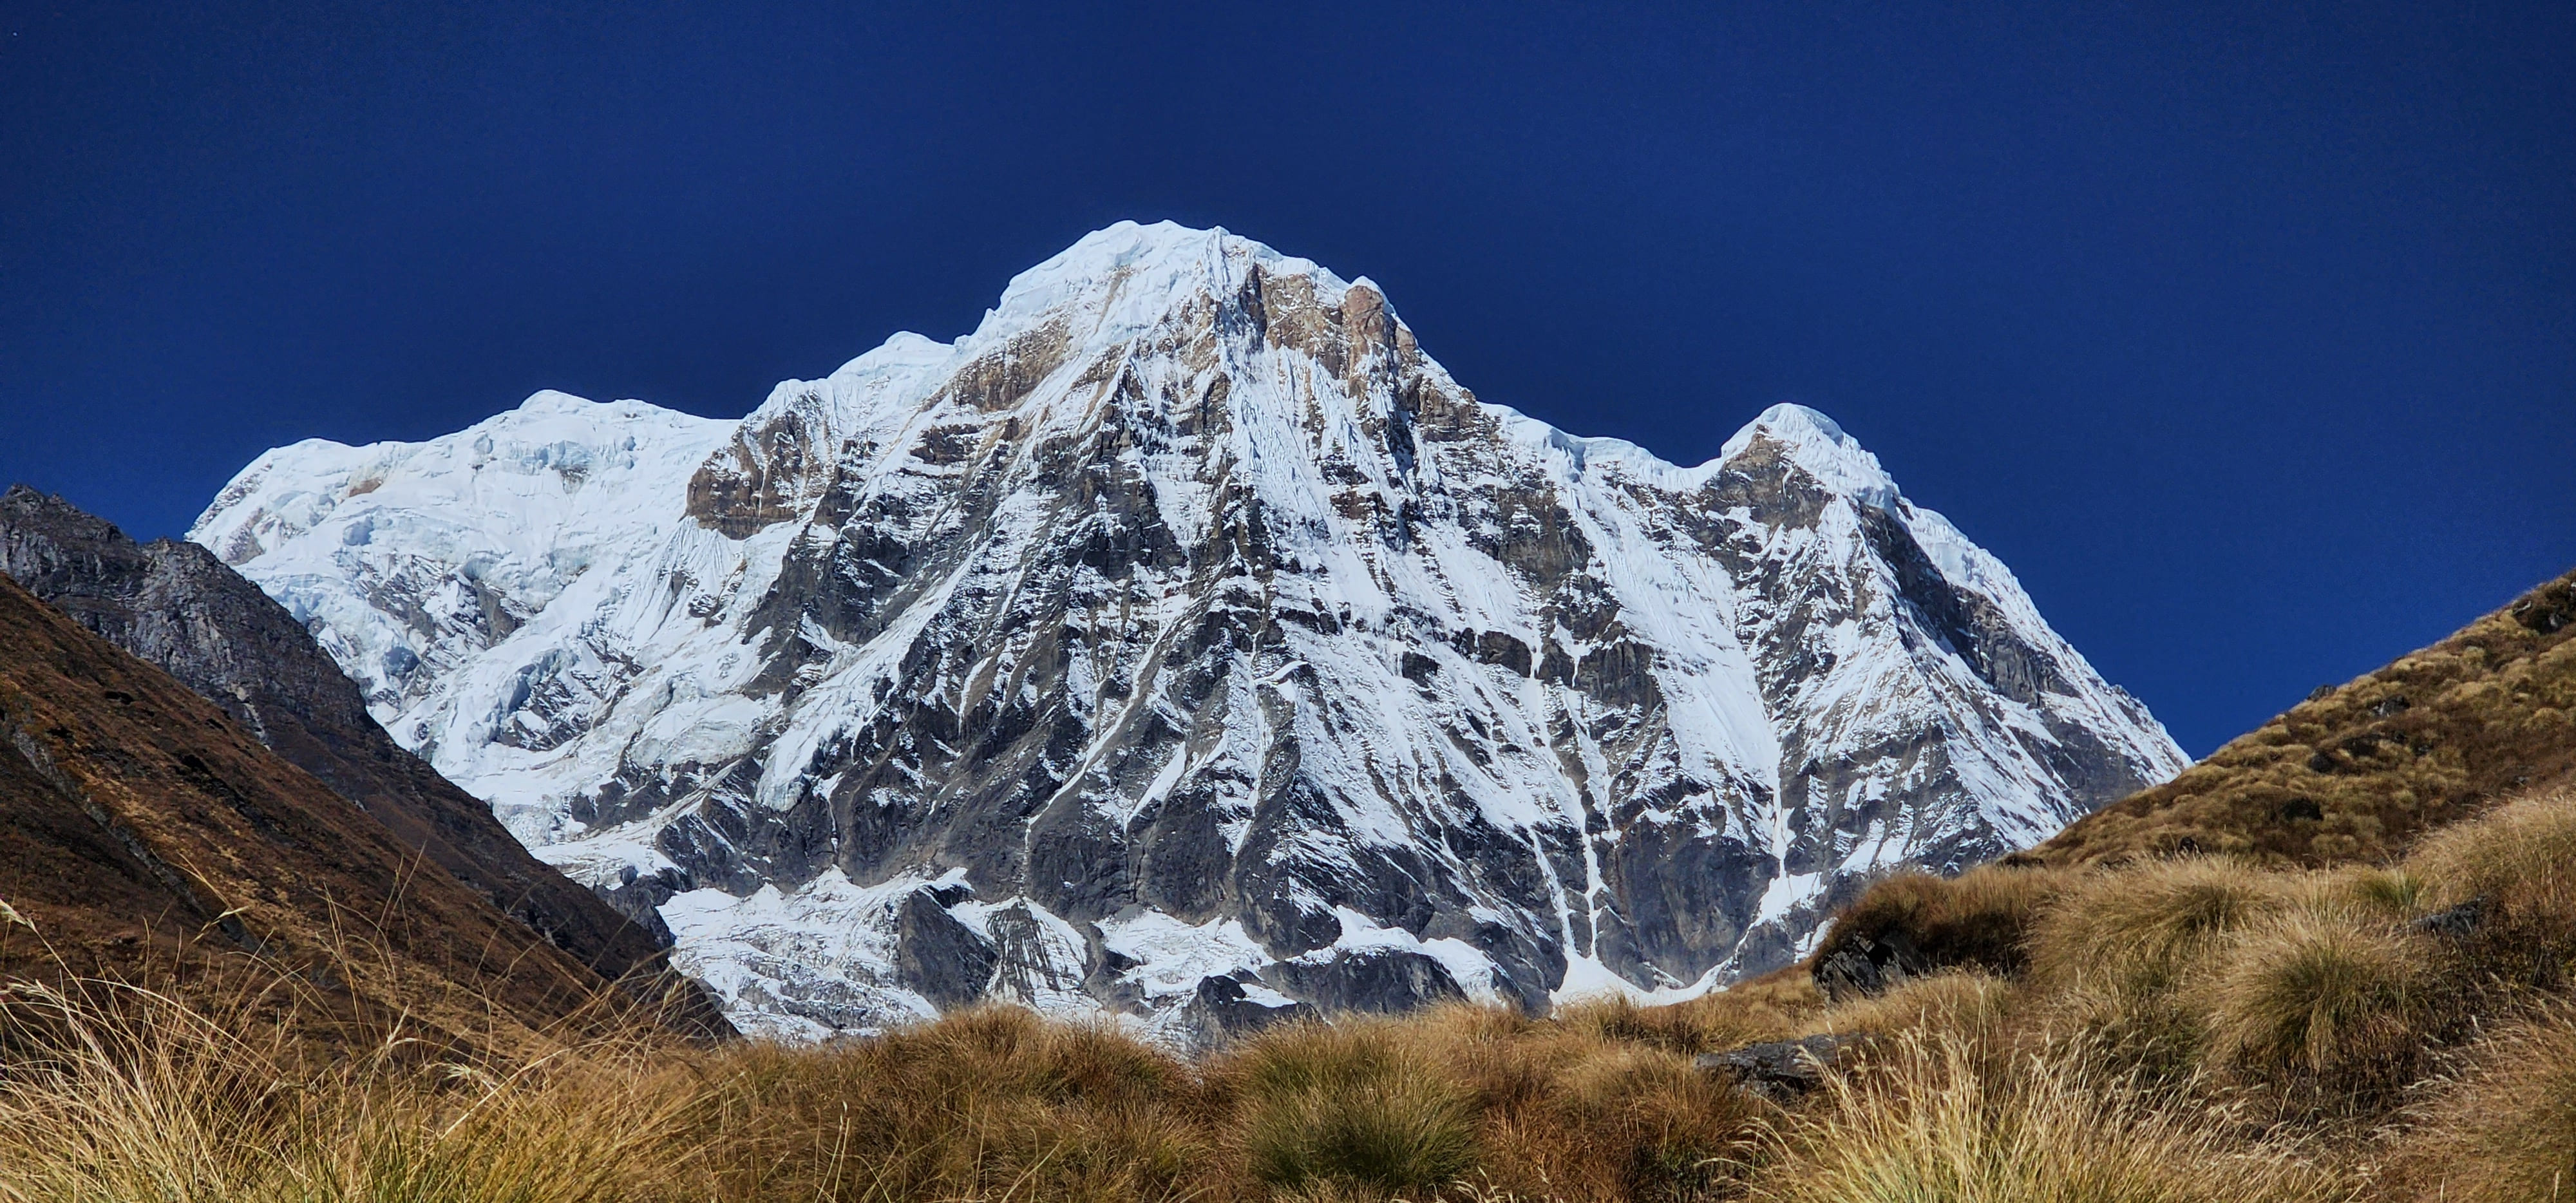
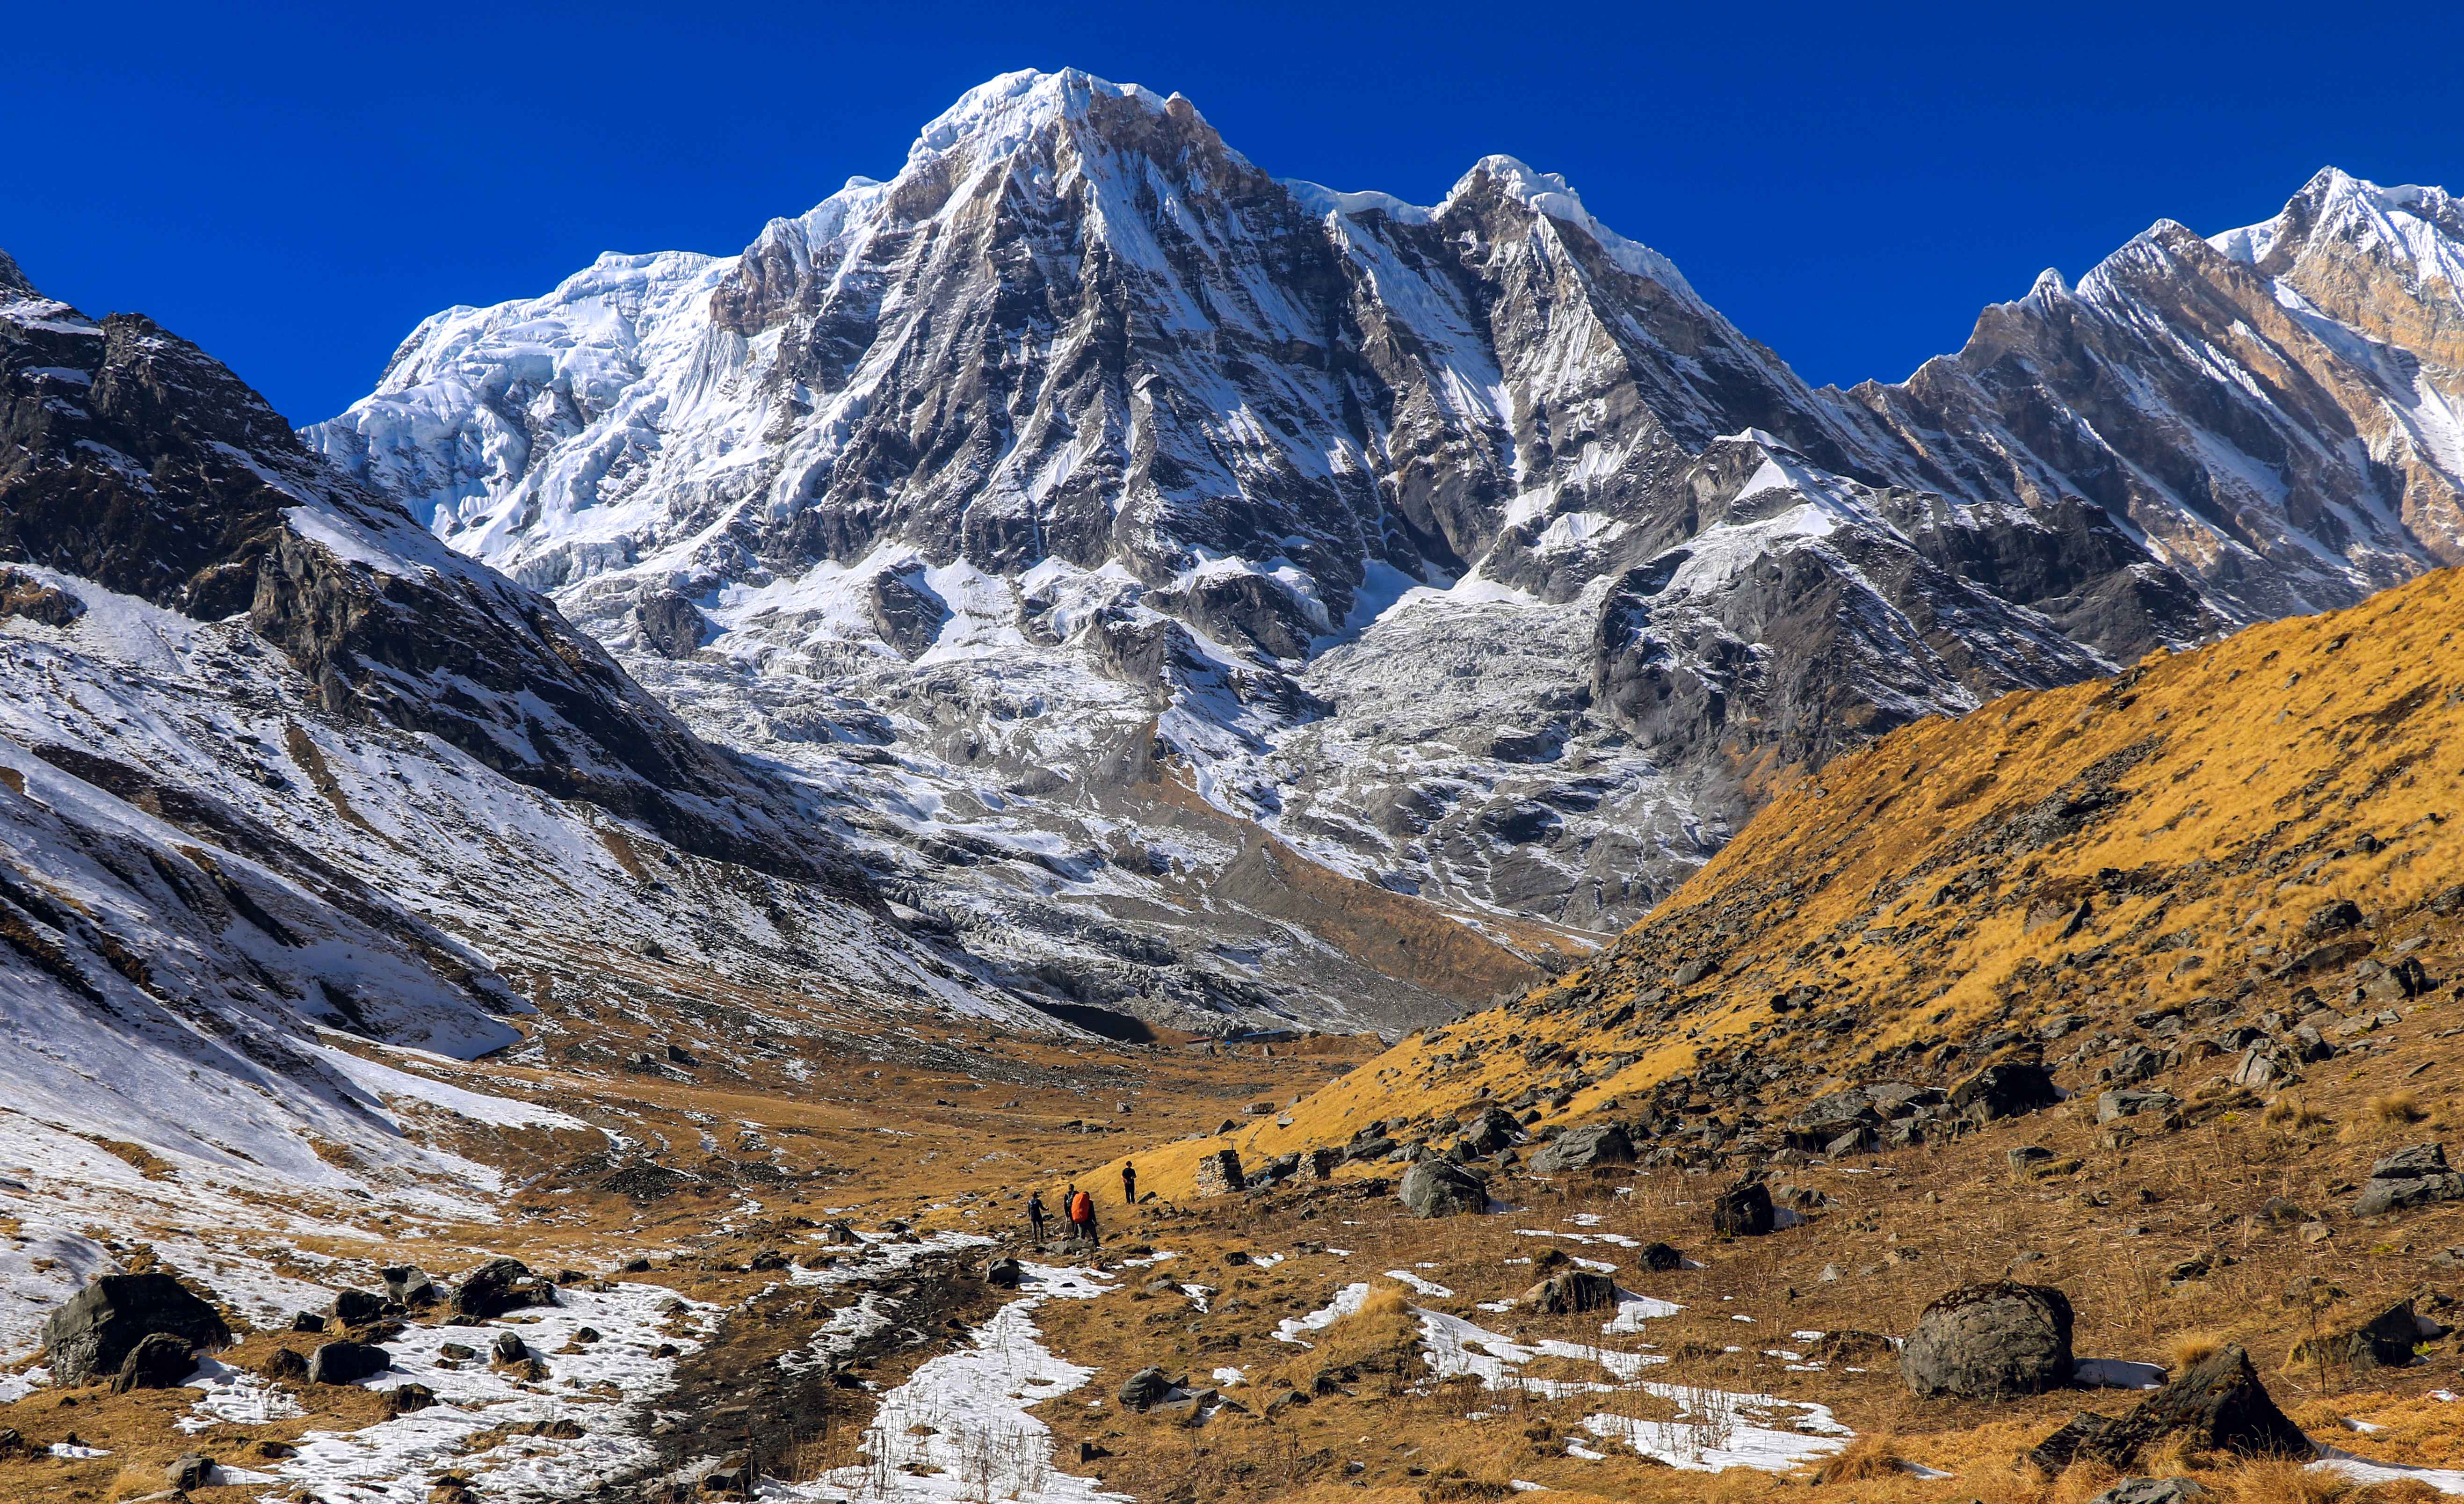
Short in distance, significant in altitude. Every trekker slows considerably here regardless of fitness. Breathlessness on flat ground at 4,000m is normal physiology, not a fitness problem. Do not rush. The full amphitheater opens around you: Annapurna I at 8,091m, Annapurna South, Gangapurna, Hiunchuli, and Machhapuchhre closing in on every side.
Day 10: ABC to Bamboo (Trek Day 8) — Hardest on Joints
Full descent through MBC, Deurali, Himalaya, Dovan to Bamboo
The day that tests knee preparation more than any other. 1,820m of lost elevation on tired legs that have done eight days of work. The stone steps and forest path that felt manageable on the way up feel relentless on the way down. Trekking poles are not optional. Short steps, forward lean, poles planted ahead, this is where technique protects the joints. Eccentric quad strength training in preparation is specifically for this day.
Day 11: Bamboo to Jhinu Danda (Trek Day 9) — Easier
Forest trail, passing through Sinuwa and Chhomrong descent to Jhinu
A gentler close to the walking. The route passes back through Chhomrong and descends to Jhinu Danda at 1,780m. The natural hot springs beside the Modi Khola are 20 minutes below the village after nine days on the trail, they are exactly what the body needs before the drive back to Pokhara the next morning.
The Sections That Catch People Out
The Ulleri Staircase
More than 3,000 stone steps. Roughly 443 metres of gain between Tikhedhunga and Ulleri in under 2 kilometres. It starts within the first hour on what are still fresh legs. The total Day 3 elevation from Nayapul to Ulleri is around 890 metres. Every trekker who has not done stair training in preparation says the same thing at the top. Every trekker who has trained on stairs says it was fine. The preparation gap here is the clearest and most preventable one on the entire route.
Chuile to Sinuwa
This is the most physically complex day on the lower trail and the one most people do not see coming. You descend from Chuile to the Kimrong Khola, climb to Gurjung and then up to Chhomrong at 2,170m, the last stop with full facilities before the sanctuary, before dropping steeply on long stone staircases down to the Chhomrong River, and climb back up to Sinuwa at 2,360m. The net elevation gain for the day is modest. The cumulative ascent and descent is not. This is where patellofemoral pain syndrome first appears on the route, not from overwork but from descent mechanics the body has not been trained for.
Himalaya Hotel to MBC
From Himalaya Hotel at 2,920m you climb through the last of the bamboo forest to Deurali at 3,230m, the entry checkpoint to the Annapurna Sanctuary, and then continue through fully open alpine terrain to MBC at 3,700m. Total gain of 780 metres over roughly 8 kilometres. This is where the aerobic base built over 10 to 12 weeks of training does its most visible work. Every step above Deurali requires deliberate pacing. Slow and steady is not advice at this altitude. It is the only functional pace.
ABC to Bamboo
1,820 metres of lost elevation in a single day, on stone steps and forest path, on legs that have completed eight consecutive days of trekking. This is consistently the most damaging day on unprepared knees on the entire route. The descent from ABC passes back through MBC, Deurali, Himalaya Hotel, Dovan, and ends at Bamboo at 2,310m. Eccentric quad strength, built through step-downs, reverse lunges, and long loaded downhill hikes during training, is the specific preparation this day demands. Almost every trekker who reports serious knee pain on this route skipped downhill training. Trekking poles, short steps, and a slight forward lean are the technique elements that protect the joints through this section.
Knee Health
Knee problems are the single most common physical complaint on the Annapurna Base Camp trek, and they are almost entirely predictable and preventable. The two conditions to know about are patellofemoral pain syndrome and IT band syndrome. Both are caused by the steep descent sections, particularly the ABC to Bamboo return, and both occur in trekkers who have trained cardio vascularly but neglected the specific strength work that protects the joints going downhill.
Patellofemoral Pain Syndrome (Hiker's Knee)
Pain around or behind the kneecap, typically worsening on descents and stair climbing. Caused by the kneecap not tracking correctly in its groove, usually the result of weak quads, weak glutes, or poor descent mechanics. On an incline, the knee absorbs 2 to 3 times your body weight according to Harvard Medical School research. Across 1,820 metres of descent, that load is enormous on unprepared joints.
IT Band Syndrome (ITBS)
Sharp or burning pain on the outer side of the knee, caused by the iliotibial band rubbing against the lateral femoral condyle during repetitive knee flexion under load. Common in hikers doing high-volume downhill after a long period without such training. Weak hip stabilisers are frequently a contributing factor, which is why glute strength is as important as quad strength for descent protection.
How to prevent both conditions before the trek
Prevention Method | What It Does | When to Start |
Single-leg step-downs | Builds eccentric quad strength, the specific muscle action of controlling the knee on descent. The most directly relevant exercise for preventing PFPS on the ABC return. | Week 4. 3 sets of 8 per leg, 3 to 4 seconds lowering phase. Increase height and add load progressively. |
Glute bridges and clamshells | Strengthens the hip stabilizers that control knee alignment on descent. Weak glutes are the most commonly missed factor in ITBS prevention. | Week 1. Include in every strength session throughout the plan. |
Trekking poles on descent | Research consistently shows poles reduce compressive force on the knees by up to 25 percent on steep descents. On 1,820 meters of downhill in a single day, that reduction is cumulative and significant. | Train with poles from Week 6 onwards so the technique is automatic before the trek. |
Long downhill hikes with pack | The only way to train the specific muscle endurance needed for the ABC to Bamboo descent. Short step-downs in a gym are useful. Long loaded descents are what actually simulate the day. | Week 7 onwards. One per week minimum, increasing duration and pack weight. |
Short steps on descent | Taking short steps rather than long strides reduces knee impact force on descent. Long strides extend the knee more, increasing pressure on the joint. Practice this technique on every downhill in training. | Start from first training hike. Make it habit before Nepal. |
Lean slightly forward on descent | Leaning backward when descending increases knee load. A slight forward lean keeps the center of gravity over the legs and transfers some load to the hip flexors and glutes, reducing the strain on the kneecap. | Practice on every downhill section in training. Guides reinforce this on the trail. |
If you already have knee problems
Talk to a physiotherapist or sports medicine doctor before the trek, not after problems develop on the trail. Many people with prior knee issues complete this route without problems because they have worked on the specific strength deficits in advance. What does not work is hoping the knee holds out for 9 days. The descent from ABC is long enough that a pre-existing weakness will show up.
Myths About Fitness and the ABC Trek
"It's just walking. Anyone can do it."
Walking 7 hours uphill on stone steps at altitude, repeatedly, for 9 days, is not the same activity as walking to work. The cumulative demand of back-to-back days with only a cold night's rest between them is a specific physical challenge. The route is achievable for most people. It is not just walking, and treating it as such is the most common reason trekkers have a hard time on it.
"Being fit protects you from altitude sickness."
Altitude sickness has no relationship to fitness. It is caused by ascending faster than the body can adapt to reduced oxygen availability. Athletes and non-athletes are affected with similar frequency. Some of the fittest trekkers our guides have led have experienced AMS above 3,000m. Fitness helps with physical output and recovery. It does not protect against AMS. Pacing, hydration, and a properly structured itinerary are the actual risk reducers.
"Running is enough preparation."
Flat running builds cardiovascular base, which matters. It does not prepare your legs for 3,000 consecutive stone steps, carrying a loaded hip-belt pack for 7 hours, or the eccentric quad demand of 1,820 metres of descent. Trekkers who run regularly and do nothing else consistently find that their cardiovascular system is fine but their legs are not ready for Day 1 or the return descent. Running is a useful component of training. It is not a complete preparation for this specific trail.
"You can train in the last 2 to 3 weeks before the trek."
The body does not meaningfully adapt to training in 2 to 3 weeks. Cardiovascular fitness, muscle strength, and the specific recovery capacity that multi-day trekking demands all build over months of consistent work. Starting an intense program 2 weeks before departure is more likely to produce injury or accumulated fatigue than genuine fitness gain. The final two weeks should involve reduced volume, not sudden intensity.
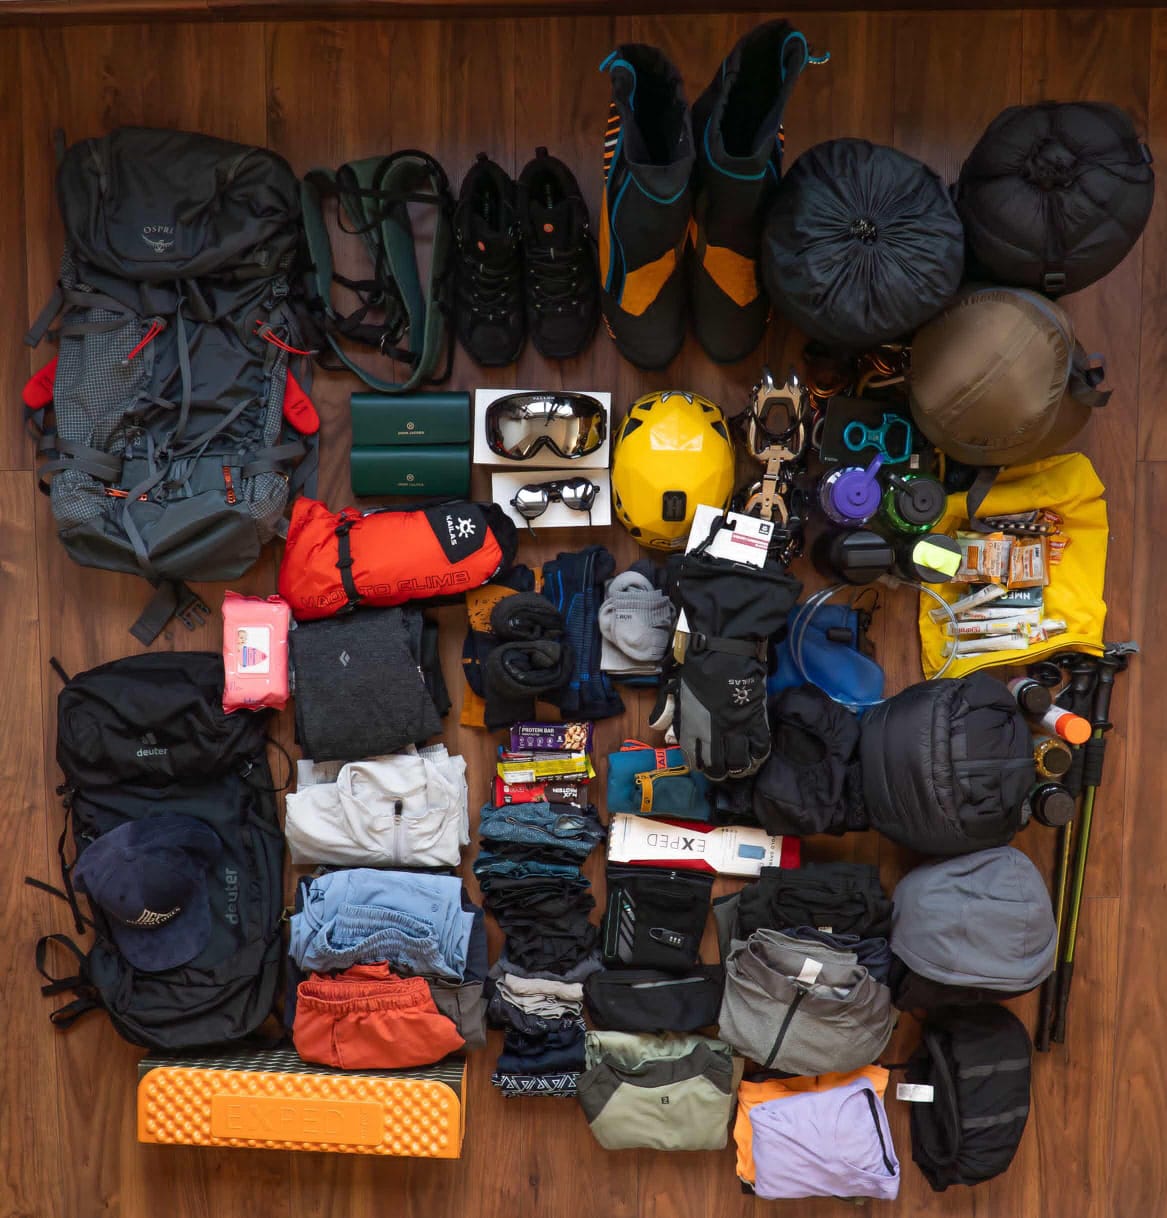
"Porters carry everything, so pack weight doesn't matter."
Porters carry your main duffel bag. You carry your daypack every step of every day. Properly loaded, that pack weighs 5 to 7 kg: water bottle plus a down jacket, rain layer, camera, snacks, first aid kit, and a headtorch. Training without a pack means your shoulders, hips, and core are not prepared. Pack training from Week 4 is necessary, not optional.
"The uphill is the hard part. The descent is just easier."
The descent from ABC to Bamboo is harder on the body than any uphill day on the route. Going downhill on steep stone steps places 2 to 3 times body weight through the knee joint with every step, according to research from Harvard Medical School. On a day that covers 1,820 meters of descent on already tired legs, this is where unprepared trekkers develop knee pain that follows them home. The descent demands specific training, not just good cardiovascular fitness.
12-Week Training Plan
Build the Base (Weeks 1–3)
3 cardio sessions per week, 35 to 45 minutes each. Brisk walking, cycling, or light jogging at a pace where conversation is possible but effortful. Consistency over intensity at this stage.
2 strength sessions: squats, lunges, glute bridges, calf raises, and planks. 3 sets of 12 to 15 reps bodyweight. Add clamshells for hip stabilizer work from day one, as these protect the knees throughout the plan.
Weekend hike: 2 to 3 hours on any terrain with 3 to 4 kg in the actual trek daypack. Wear your trekking boots from the first session.
1 to 2 full rest days per week. Adaptation happens in recovery. Skipping rest days does not speed up gains. It delays them.
Add Stairs, Hills, and Eccentric Work (Weeks 4–6)
4 cardio sessions per week, 45 to 60 minutes. At least 2 must be on stairs or hills. A stair climber at a gym works if no outdoor stairs are available. This directly prepares the Ulleri section and the Ghorepani ascent.
Stair training: 30 minutes on real stairs, twice per week. Include descents in every session. Descending stairs trains the knee-protective muscles that matter most on this route.
Introduce single-leg step-downs: step off a low box, lower the opposite foot slowly over 3 to 4 seconds. This is the most important new exercise this phase. 3 sets of 8 per leg. This directly prepares the knees for the Chhomrong descent and the ABC return.
Add glute bridges loaded: place a weight plate or dumbbell across the hips. Strong glutes control knee alignment on descent and reduce ITBS risk significantly.
Weekend hike: 3 to 4 hours with 4 to 5 kg. Include as much descent as possible. Find a hill and walk down it multiple times.
Start back-to-back training days: hike Saturday and Sunday. The second day shorter is fine. The point is teaching the body to move again before full recovery.
Trek-Specific Load (Weeks 7–10)
4 to 5 sessions per week. Mix long steady cardio (60 to 75 minutes) with hill and stair repeats. Prioritize trail terrain over flat roads wherever available.
Your longest training hike: one 5-to-6-hour hike with 6 to 7 kg in the pack. This is the most important single training day in the plan. It reveals gear problems, hotspots, and any remaining fitness gaps before Nepal.
Stair training: increase to 45 minutes with a loaded pack (4 to 5 kg). Descend every session. The descents are doing more protective work than the ascents at this point in the plan.
Strength: progress squats to heavier goblet or barbell variation. Add Romanian deadlifts for hamstring and lower back endurance, which are heavily loaded on the ABC to Bamboo descent and frequently underprepared.
Single-leg step-downs: increase box height and add weight progressively. By the end of Week 10, you should be doing 3 sets of 10 per leg from a 40 to 50cm box under control.
Continue back-to-back weekend days. Attempt once during this phase to go with under 10 hours between the two sessions. This simulates the real rest window the trail provides.
Taper and Arrive Fresh (Weeks 11–12)
Reduce training volume by 40 to 50 percent. Fitness is already locked in. The body needs time to absorb the training load before it is tested in the field.
3 to 4 light sessions per week: easy walks, gentle cycling, stretching, and foam rolling. Nothing new, nothing at high intensity.
One short hike (90 minutes) with the full trek daypack to confirm gear fit, no hotspots, and boot comfort under load.
Prioritize 7 to 9 hours of sleep per night. Arriving in Nepal well-rested is worth more in this final week than any training session.
Complete all gear checks now. Boot problems, pack fit issues, and waterproofing failures are manageable at home and not manageable at Deurali.
Exercises Matched to Specific Trail Sections
Exercise | Prepares You For | How to Progress |
Stair climbing (loaded) | Ulleri staircase Day 1 (3,000+ steps), Ghorepani ascent Day 2, Sinuwa climb Day 5. Most directly specific exercise on this list. | Start 20 min bodyweight. Build to 45 min with 5 kg pack. Include descents every session. |
Single-leg step-downs | Chhomrong descent Day 4, ABC to Bamboo return. Eccentric quad loading that protects the kneecap on steep downhill. Most important and most commonly skipped exercise for this route. | Step off box slowly, 3 to 4 seconds lowering phase. Single leg. Increase height and add hand weights progressively from Week 4 to 10. |
Glute bridges (loaded) | All descents. Strong glutes control knee alignment and reduce ITBS risk. Hip stabiliser weakness is the most common missed factor in knee problems on the return. | Bodyweight to loaded with plate. Single-leg variation from Week 6. 3 to 4 sets throughout the plan. |
Squats (slow descent phase) | All uphill days. Sustained quad demand of 5 to 7 hours of stair climbing per day across consecutive days. | Bodyweight to goblet squat to barbell. 3 seconds down, pause, drive up. 4 sets of 10 to 12. |
Romanian deadlifts | ABC to Bamboo descent: 1,820m of downhill places sustained demand on the hamstrings and lower back over 6 to 7 hours. Frequently undertrained for this route. | Light load, hinge from hips, slow controlled movement. Build from Week 5. Focus on form throughout. |
Calf raises (single leg) | Every stone staircase on the route. Weak calves fatigue early and shift load upward to the knees. A fatigued calf on Day 1 affects knee health on Day 6. | Both legs to single leg. Add weight. 3-second slow lowering phase. Every strength session without exception. |
Loaded uphill hike with poles | Every uphill day on the trek, plus the pole technique needed for the descent. The one session that trains cardiovascular output, strength, pack carrying, and technical skill together. | Start 4 kg, 45 min. Build to 7 kg, 5 to 6 hours by Week 9. Use actual boots and poles throughout. |
Training With Your Pack
Porters carry the main duffel. You carry the daypack every step of every day. Loaded with water, a down jacket, rain shell, snacks, camera, first aid kit, and a headtorch, that pack weighs 5 to 7 kg. Training without it means your shoulders, hips, and core have no preparation for 7 hours of uneven terrain under that load.
From Week 4, at least one session per week uses the actual trek daypack loaded to 4 to 5 kg. By Weeks 8 to 10, the longest hike carries 6 to 7 kg. This is both a strength measure and a gear check. A hip belt that causes a hotspot after 2 hours needs adjusting before Chhomrong, not at Chhomrong. Boots that feel almost broken in need more walking time. The only way to find these things out is to walk loaded for a long time.
On trekking poles
Poles reduce knee load on descents by up to 25 percent. On a day with 1,820 meters of downhill, that is a cumulative and significant reduction. Ideal pole length on flat ground sets the elbow at 90 degrees. On steep descent, shorten the poles slightly so the tip contacts the ground ahead of you and helps absorb each step. If you plan to use poles on the trek, train with them from Week 6 so the technique becomes automatic before Nepal.
Fitness and Altitude
Above 2,500m the body extracts oxygen less efficiently from the air. Heart rate rises at the same physical effort that would feel easy at sea level. At ABC at 4,130m, the oxygen partial pressure is low enough that steps that felt easy at 2,000m feel deliberate and slow. This is normal physiology at these elevations, not a fitness failure.
What fitness gives you at altitude is a better base to work from. A well-trained cardiovascular system recovers faster overnight, appetite holds stronger, sleep is marginally better, and you arrive at each teahouse with energy remaining. None of this prevents AMS. But all of it makes altitude more manageable and the overall experience of the upper trail significantly better.
The Freedom Adventures itinerary incorporates the climb-high-sleep-lower principle specifically to manage AMS risk. The Poon Hill ascent to 3,210m on Day 3 followed by sleeping at Ghorepani at 2,790m is one deliberate acclimatization day built into the structure. This is part of why the ABC route handles altitude more forgivingly than Everest Base Camp route, where sleep elevations ramp more steeply through the Khumbu. The Mera Peak Climb route sits at a different level again. Multiple nights above 5,000m require dedicated altitude preparation that goes beyond the scope of a trekking fitness plan.
Altitude sickness
Never ascend to sleep at a higher altitude while experiencing AMS symptoms. Descend if symptoms worsen. This rule is absolute. Early symptoms are persistent headache, loss of appetite, nausea, dizziness, and disturbed sleep. Severe symptoms such as loss of coordination, confusion, and breathlessness at rest require immediate descent and emergency evacuation. Comprehensive travel insurance covering high-altitude trekking and helicopter rescue is not optional on this route. Diamox (Acetazolamide) must be discussed with your doctor before departure. Never start it on the trail without prior medical consultation.
Mental Preparation
Multi-day trekking has a mental fatigue curve that is entirely different from single-day effort, and it is almost never discussed in fitness guides. The physical challenge of any single day on the ABC route is manageable. The mental challenge of waking up tired, putting cold boots on, and doing it again for the seventh or eighth consecutive day is something different. Trekkers who have only ever done single-day hikes often report that the psychological demand of back-to-back days is the most unexpected difficulty of the trek.
What to know and practice before you go
Train consecutive days deliberately. The most effective mental preparation is the same as the best physical preparation: back-to-back training days from Week 4 onwards. Walking tired, choosing to go again the next morning, and discovering you can. This is not just physical conditioning. It is building the evidence base your mind will draw on above Sinuwa when the days accumulate.
Pacing is a mental skill. Above 3,000m, the correct pace is slower than feels natural for most fit trekkers. Going slower than you could is not failure. It is the correct strategy for altitude. Trekkers who walk at their comfortable lower-altitude pace above Deurali consistently feel worse at MBC than those who deliberately slow down. Practice walking at a controlled, conversation-pace on every training hike above any kind of elevation. Make it a habit before Nepal.
Bad hours are not bad days. Every multi-day trek has difficult hours: a cold wet morning, a section that feels endless, an altitude headache in the afternoon that clears by dinner. Guides on this route consistently note that trekkers who frame a hard hour as "this trek is too much for me" struggle more than those who frame it as "this hour is hard and it will pass." Neither is more accurate as a prediction. One is more useful as a response.
Disconnect is part of the preparation. Above Himalaya Hotel there is no Wi-Fi and effectively no phone signal. For most trekkers, this is the longest period of genuine disconnection from normal life they have had in years. For some it is disorienting. Practicing being unreachable, even for a few days during a training weekend, which reduces the psychological adjustment the trail otherwise forces.
How ABC Compares to Other Treks
Trek | Max Altitude | Duration | Grade | vs ABC |
4,130m | 7–12 days | Moderate | This trek. Reference point. | |
5,364m EBC / 5,555m Kala Patthar | 12–14 days | Moderate–Strenuous | Higher altitude, longer duration, more nights above 3,500m, higher AMS risk. More demanding in every measurable category. | |
5,416m (Thorong La) | 14–21 days | Strenuous | Crosses a 5,416m pass. Longer distance. Higher altitude. Requires more preparation and more time than ABC. | |
6,476m (Mera North) | 17–22 days | Strenuous + Technical | Crampons and ice axe required. Multiple nights above 5,000m. A step from trekking into mountaineering. Requires dedicated high-altitude and technical preparation. | |
3,210m | 4–5 days | Easy–Moderate | Shares the first section of the ABC route. Lower altitude, shorter duration. Good warm-up or introductory route. | |
~4,984m (Tserko Ri) | 7–10 days | Moderate | Similar grade. More remote, smaller teahouse infrastructure. A genuine alternative for trekkers considering both routes. |
Every season our guides meet trekkers at Chhomrong who say the first two days were harder than expected. And every season, the ones who arrive at Himalaya Hotel with energy remaining, who sleep well at MBC, who stand at 4,130 meters without having emptied themselves to get there, are the ones who trained for the specific sections that matter, started early enough for the body to actually adapt, and walked slowly when the altitude asked them to. The view from inside that glacial amphitheater is the same for everyone. How you feel standing in it is entirely a result of what you did in the months before you flew to Kathmandu.
KEEP EXPLORING
Uncover similar insights
Everything You Need to Know to Prepare for Your ABC Trek